Guitar building

After a couple years of thinking about it and a few years talking about it, I finally finished building an electric resonator guitar. I came up with a design that was kind of a hybrid of a few of my favorite guitars. I started with a pile of lumber and electronics, and in the end I have a great guitar. For more details, see my posts below (the earliest posts are at the bottom of the page).
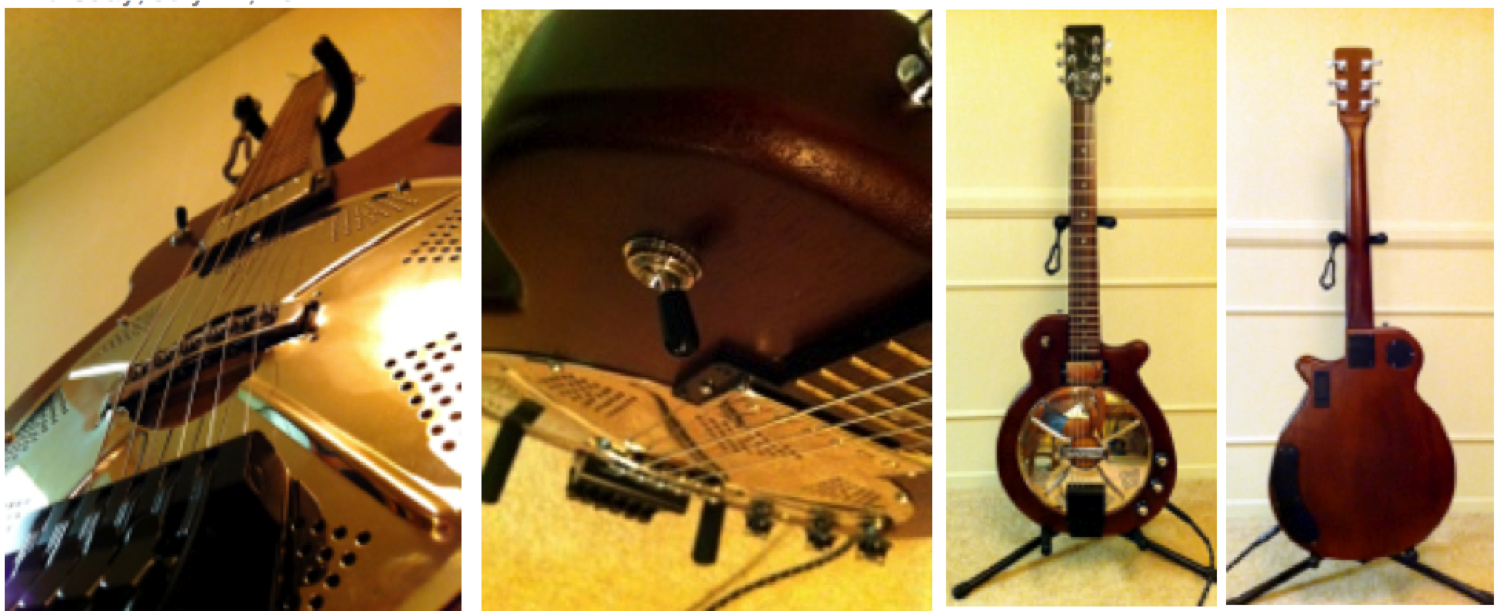
Putting it all together.
Thursday, July 21, 2011
Here it is all assembled! I used a small shim to get the neck angle right, but things pretty much worked as is. I have a few more inlays to install at some point in the next year, but it is ready to be played!
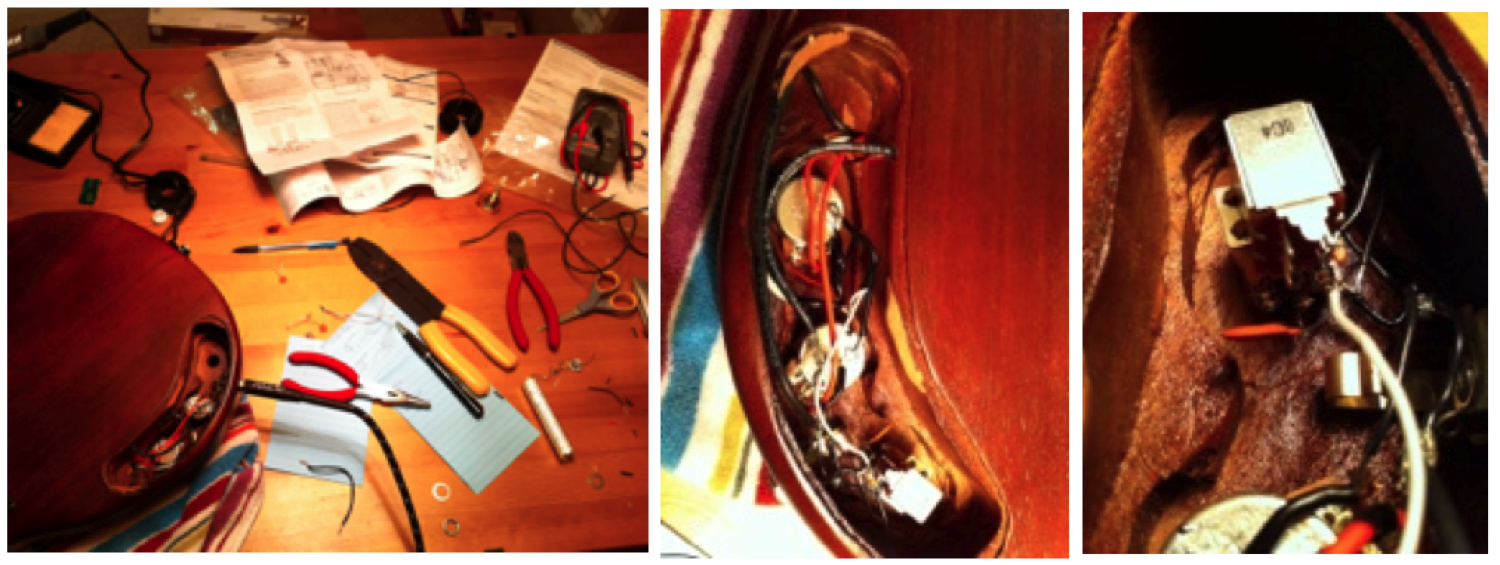
Electronics.
Wednesday, July 20, 2011
Now I’m down to my final days in Pasadena, so it’s time to finish things up. It’s also time for me to test my electrical engineering skills… I took apart the Les Paul to check the wiring and tried to find a few wiring diagrams online. The main modifications are the following. First, the bridge pickup is replaced by a Fishman Resonator Pickup. This pickup is active and the impedance was probably quite a bit different than the standard humbucker, which took me a little while to figure out. Second, a push-pull knob was used for a coil-split on the neck pickup so that it can sound either like a humbucker or a single-coil (strat-like). The other difference from the standard Les Paul wiring is that a single tone control is used to adjust the tone for both pickups.
Once it was all wired up, it hummed like crazy! Eventually I realized that ALL of the grounds needed to be connected (sometimes redundantly), but then everything was fine.
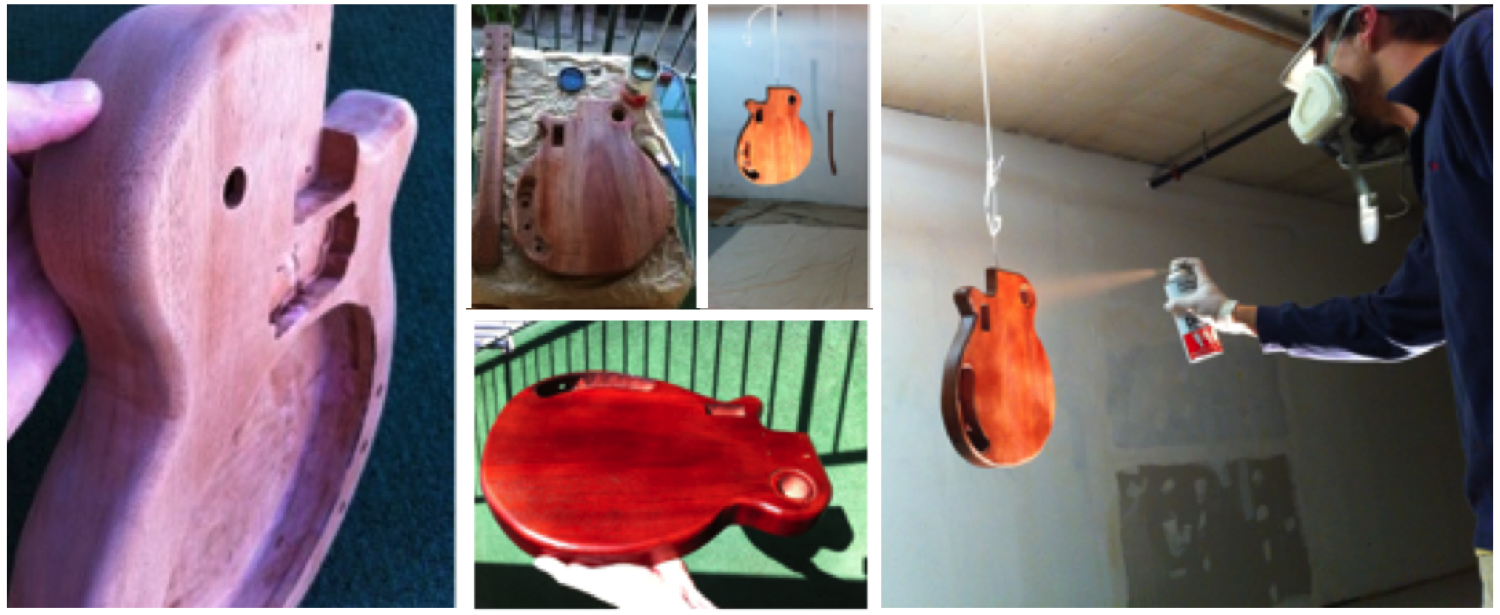
Sanding and finishing.
Monday, July 4, 2011
A couple of weeks ago, I sanded the body and neck starting with 60 grit and working down to 220 grit. I then painted on a waterbased grain filler and sanded again (220 grit) after 24 hours. I then headed over to my uncle Steve’s to spray on the nitro finish. I started with about 4 or 5 layers of sealer and lightly sanded when it was finished. The climate was pretty dry, so I only waited 30 to 40 minutes between coats. I then sprayed on about 6 coats of red mahogany nitro (avoiding the front of the neck) and let it dry overnight. The next day I sprayed on about 6 layers of clear coat and brought it home to harden for a week. Finally, I used a little steel wool and some 1000 grit wet/dry sand paper that I got from one of Steve’s friends. I’m anxious to to put it together, so I’ll probably get the electronics working and put it together so that it’s playable soon. Later I’ll probably take it back apart to sand it a little finer and put on a final polish.
Fret work.
Monday, May 23, 2011
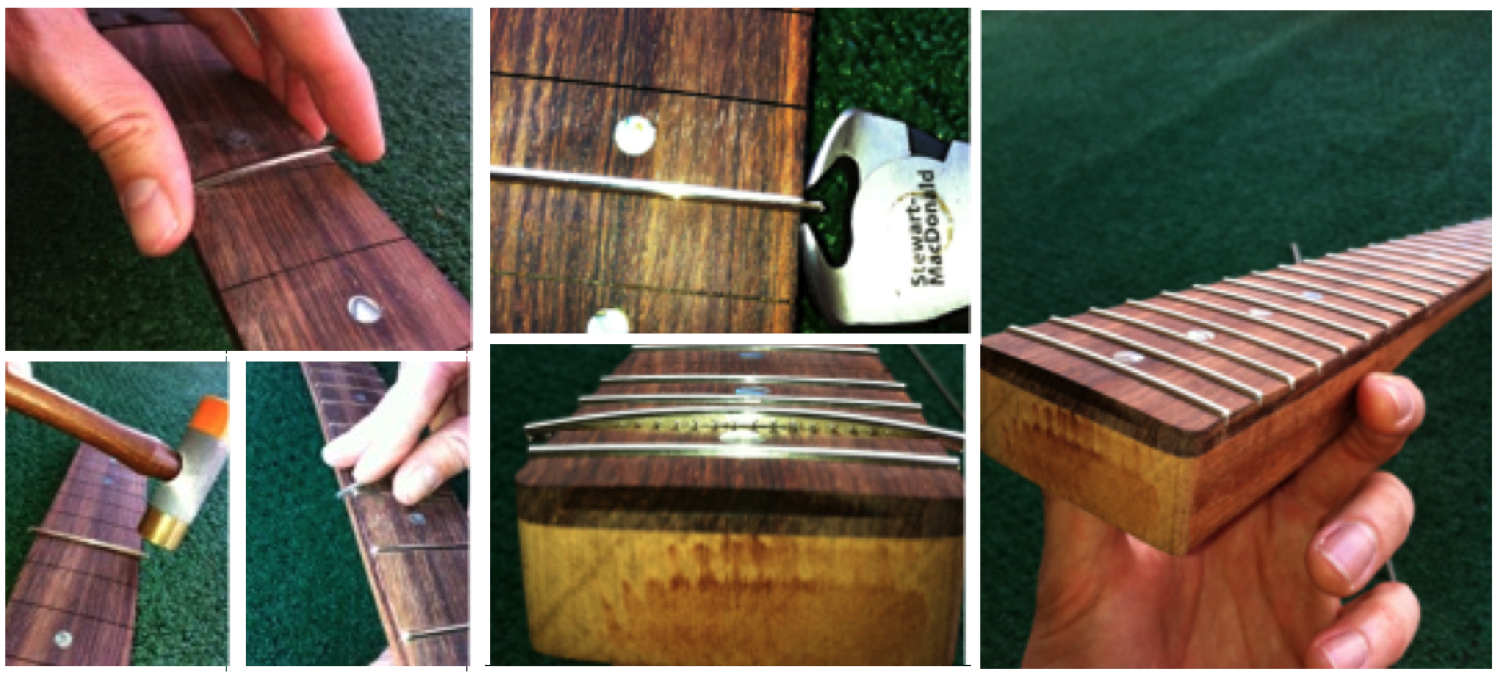
Last week I did a little more work on the body, but I’ll save that for a future posting. I also installed the dot inlays, which you can see in these photos. They were pretty simple–just drill a hole and drop them in with a little glue. I then had to level a few of them with a file to make them flush with the fretboard. This week, I installed the frets. The pictures outline the basic steps: cut the fret wire, bent the radius, hammer them in, clip the edges, level the tops and file the edges. This was my first fret work, so I’m sure there will be adjustments later, but for now they look pretty good!

Shaping the neck profile.
Tuesday, May 4, 2010
After a little more delay, this weekend I was able to shape the neck profile. I assumed that this part would be tricky, so I wanted to take my time. I didn’t use any sort of template, so the profile is pretty unique. It has a chunky feel similar to a ’58 Les Paul near the neck and becomes more or an oval higher on the neck. I basically carved it, would see how it felt, and then carve some more. The end result feels pretty good and was very satisfying.

Trust rod installation and headstock shaping.
Tuesday, January 26, 2010
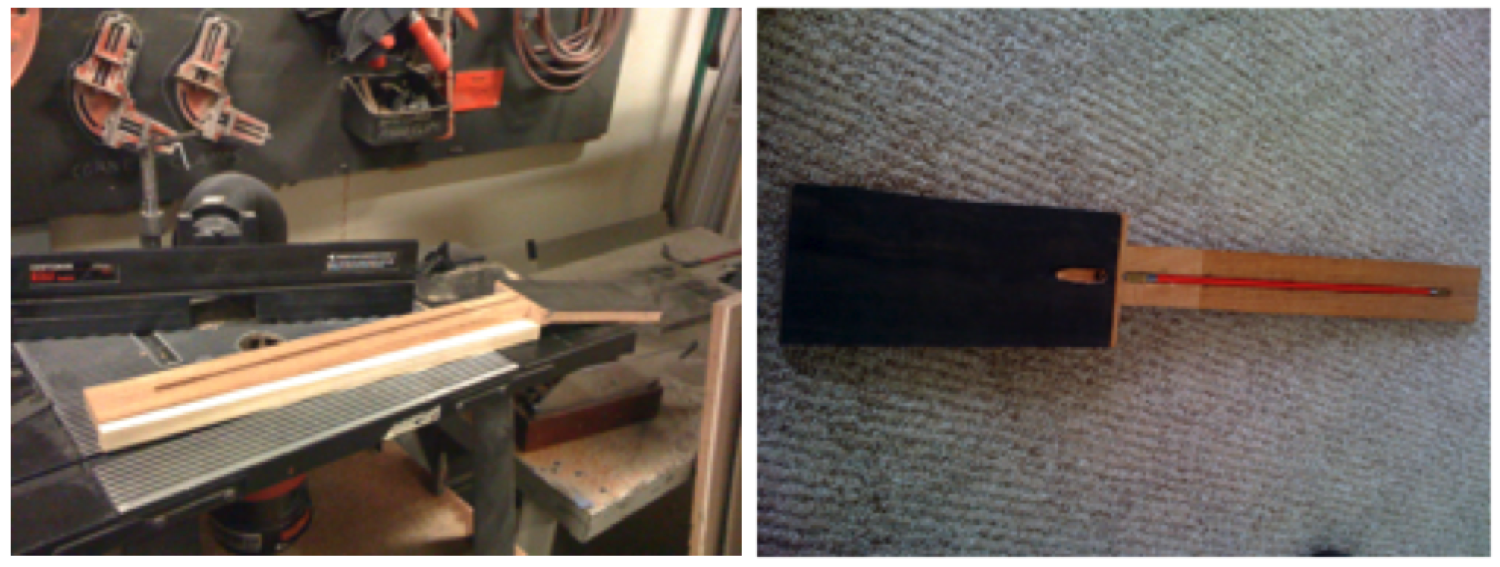
After routing the slot for the trust rod, I put it into place and glued on the fretboard. I read that it’s smart to put a little caulk on the trust rod to avoid any rattle later, so I did that too. I then sawed the neck and headstock to shape. At this point it actually started looking like a guitar neck rather than a piece of wood. Next I drilled the through holes for the tuners, which will be installed at the very end. Finally, I gave it a quick sanding to smooth out the rough ends. It’s looking pretty good now.
Finally starting the neck.
Wednesday, December 16, 2009
After many months of delay, I finally got access to the wood shop a couple of weeks ago. So, now it’s time to start working on the neck. I first used the band saw to cut the neck to the right dimensions. Next came the routing for the trust rod (i.e. the metal bar that helps support the neck against the tension of the strings). I used a table router in the shop, which worked pretty well.
Now for the tough part…drilling the hole through the headstock to connect to the newly created route. At first I thought this would be easy: line everything up and use a drill press. But, it turned out that because of the angle of the headstock, the drill bit wasn’t long enough. I tried to cheat by going in at a small angle, but as anyone with wood working experience knows, that was a bad idea. I eventually got a through-hole which allows me put the trust rod through the neck and headstock; however, I cut too far into the headstock and almost made a hole in the back of it. Lesson learned: buy a really long drill bit next time!
For now things seem ok. I may add a small veneer on the back of the headstock to be safe, but for now I’ll just leave it and see how things progress. The next step will be gluing on the fretboard, cutting it to size, and band sawing the headstock shape. But those will have to wait until next month. For now, it’s time for Christmas vacation (away from CA)…
Cutting the body by hand.
Monday, July 13, 2009
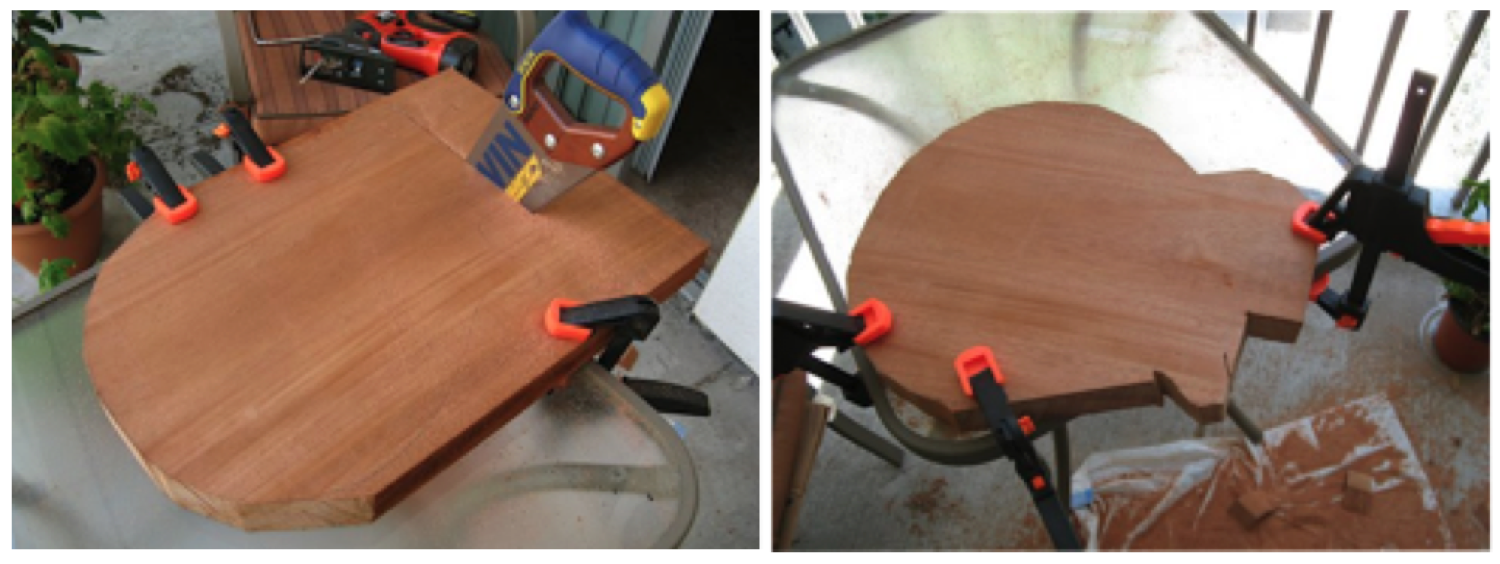
Well, I started cutting the body this week. I was hoping to get into a machine shop on campus to use some of their equipment, but the only shop that I could get access to was for metal working. Because of this and my limited space, I started cutting the body out by hand with a hand saw. Needless to say, this was a bit difficult and time consuming; however, it was quite satisfying.
So, the next step will be routing the cavities on the body and cleaning up the rough cuts I made this week. I also found out about a student workshop on campus. I think that this project is getting a little too big for my small balcony, so I’m in the process of getting access to the student shop. Hopefully I can get in there by next week…
Design, layout, and parts.
Sunday, July 5, 2009
Guitar building has always seemed appealing to me, and I had a design that I wanted for a unique guitar with various special features. For starters, I’ve been playing a lot of resonator slide guitar lately but had a few issues when it came to stage performances. First, feedback and volume have always been a problem when playing live with electric guitars, drums, etc. Second, the neck joins the body at either the 12th or 14th fret on most vintage resonators, and there is no cut away, which makes hitting those high notes a bit difficult. Finally, when playing slide, I like to switch tunings a lot, which is also difficult in a live setting. To solve these problems, I’ve decided to create my own guitar.
This guitar is sort of a combination of other guitars that I like. The body is based on a blend of my 1934 National resonator and a Les Paul. The neck has the longer scale length of a Fender but will have a thicker neck profile (hopeful similar to a 1958 Les Paul). For the electronics, I’m using one humbucker, which can be coil-split, and a pickup directly on the resonator. This way, I can choose and blend many types of sounds. Finally, I’m trying a hipshot bridge that should allow me to quickly change between tunings.
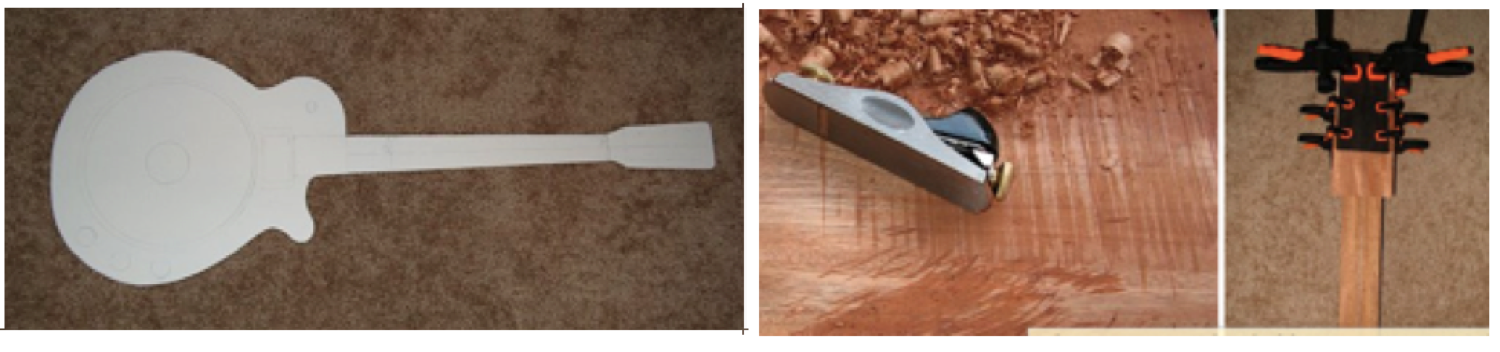
The images here are from the planing of the body and the gluing of the veneer. The body and neck are mahogany (FSC certified, meaning that it was obtained in a sustainable way) and the fingerboard is rosewood. Planing of the mahogany removes the rough saw marks and reveals the natural beauty of the wood. Looking forward to seeing it after the finish is applied…

Here are the parts.
Sunday, July 5, 2009
Not much to say here. I added this page to show the starting point. A description of the guitar design and parts is giving in the next posting.